

 Authenticate
 Manage Users
 Customize
 Auth0 AI
 Platform
You must have an Enterprise subscription to manage certificates in your custom domain. To learn more, read Auth0 Pricing and Login.
- Have more control of your certificates (such as choosing your own CA or certificate expiration).
- Enable additional monitoring over your API calls to Auth0.
Your proxy to Auth0 must use TLS (SSL) version 1.2 or newer.
Provide your domain name to Auth0
- Go to Dashboard > Settings > Custom Domains or Dashboard > Branding > Custom Domains. Enter your custom domain in the provided box, and select Self-managed Certificates from the drop-down menu.
- Choose Add Domain. You can only add one domain per tenant even though the Add Domain button still appears after you add a domain.
Verify ownership
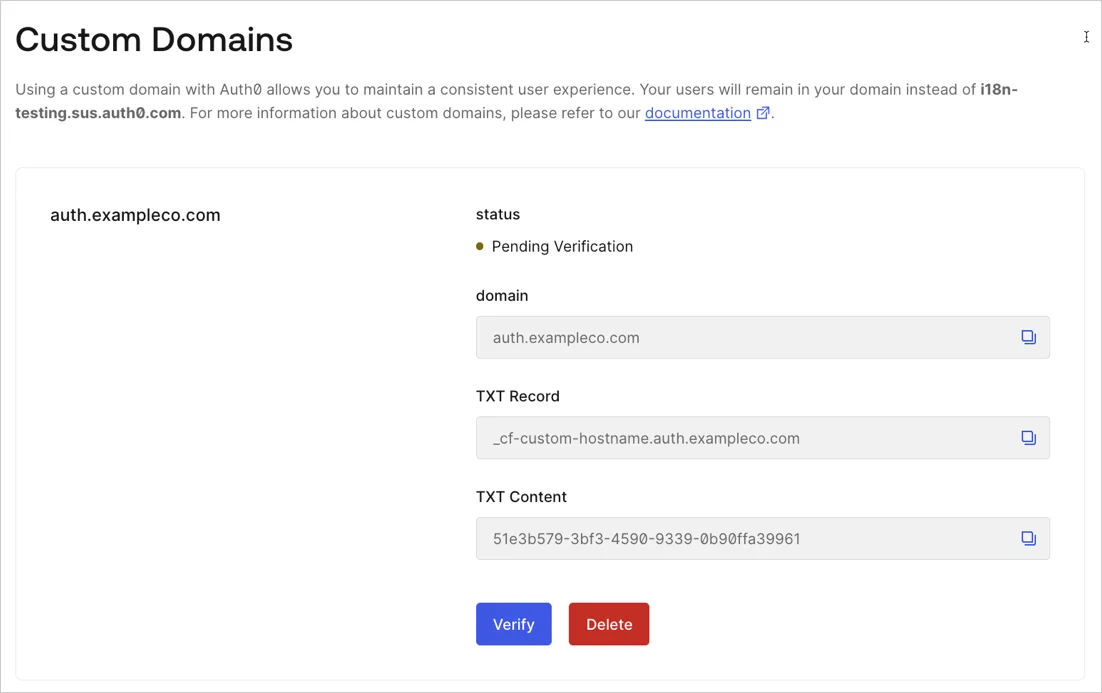
Before you can use the domain with Auth0, you’ll need to verify that you own it.-
Go to Dashboard > Branding > Custom Domains.
-
Add the TXT verification information to your domain’s DNS record.
These steps may vary for your domain host provider:
- Keep the Auth0 custom domain page open in your browser so you can copy values.
- Log in to your domain management service.
-
Create a new record, and save it with these settings:
-
Click Verify to proceed.
It may take a few minutes before Auth0 can verify your domain, depending on your DNS settings.
If Auth0 successfully verified your domain name, you’ll see a confirmation window.
Save the information provided in this window, specifically the
cname-api-keyvalue, since this is the only time you’ll see this value.The verification process is complete, and within 1 to 2 minutes, your custom domain should be ready to use. If you are unable to complete the verification process within three days, repeat these steps.For security purposes, this value is hashed when stored, so it cannot be recovered. If you fail to capture thecname-api-keyat this time, you will have to recreate the custom domains.
Configure reverse proxy
The reverse proxy server retrieves resources on behalf of your application from one or more servers. These resources are then returned to the application, appearing as if they originated from the proxy server itself. You can use a service such as Cloudflare, Azure CDN, Google Cloud Platform, or AWS Cloudfront and configure settings for your custom domain. You will add the new CNAME value to your DNS for your custom domain pointing to the reverse proxy server domain name for distribution.- After you’ve created the reverse proxy settings on your service, go to Auth0 Dashboard > Branding > Custom Domains tab.
- Add a new CNAME record to your DNS for your custom domain pointing to the service domain name for your distribution. You can find this by looking for the Distribution ID on your reverse proxy server configuration. Once added, the CNAME record must be present at all times to avoid issues during certificate renewal.
- The way you configure the proxy server will vary depending on the service you use. You will likely need to configure the following types of settings:
Distribution settings
Origin hostname settings
For more information on retrieving the details of your custom domain, see Get custom domain configurations.
HTTP headers
Auth0 uses the end user’s IP address for features such as anomaly detection, rate limiting, and MFA. If your proxy does not forward the end user’s IP address, Auth0 treats your proxy’s IP address as the client, which may cause these features to behave incorrectly.