

 Authenticate
 Manage Users
 Customize
 Auth0 AI
 Platform
Get Started
This quickstart demonstrates how to add Auth0 authentication to a Go web application. You’ll build a server-side app with login, logout, and user profile features using the go-auth0 SDK and Go’s standardnet/http library.
1
Create a new project
Create a new directory for your Go application and initialize a module.Install the required dependencies:Create the project structure:
View expected go.mod
View expected go.mod
go.mod
2
Setup your Auth0 application
To use Auth0 services, you need an application set up in the Auth0 Dashboard. The Auth0 application is where you configure authentication for your project.You need the following information from your application’s Settings tab: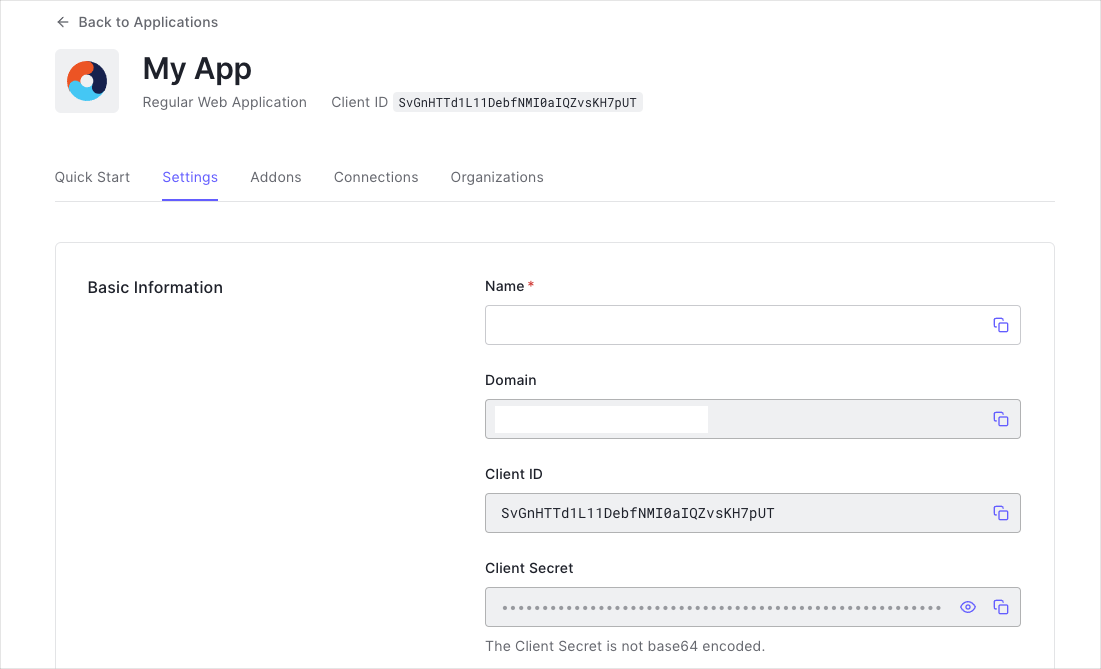 You have three options to set up your Auth0 application: use the Quick Setup tool (recommended), run a CLI command, or configure manually via the Dashboard:
- Domain
- Client ID
- Client Secret
- Quick Setup (recommended)
- CLI
- Dashboard
Create an Auth0 App and copy the pre-filled
.env file with the right configuration values.3
Create the Auth0 client
Create the What this does:
auth.go file. This wraps the go-auth0 authentication client and provides a helper to build the authorization URL.auth.go
- Initializes the
go-auth0authentication client with your tenant’s domain, client ID, and client secret - Provides an
AuthorizationURLhelper that builds the/authorizeredirect URL with the required OAuth2 parameters
4
Create route handlers
Create the Key points:
handlers.go file with handlers for login, callback, user profile, and logout.handlers.go
- LoginHandler generates a random state parameter for CSRF protection and redirects to Auth0’s Universal Login
- CallbackHandler exchanges the authorization code for tokens using
go-auth0, then callsUserInfoto get the user’s profile - LogoutHandler clears the session and redirects to Auth0’s
/v2/logoutendpoint - UserHandler retrieves the profile from the session and renders the template
5
Create HTML templates
- home.html
- user.html
templates/home.html
6
Create the main server
Wire everything together in
main.go:main.go
Project structure
Project structure
7
Run and test your application
Start the development server:You should see:
Server listening on http://localhost:3000/Open http://localhost:3000 in your browser. Click Sign In to be redirected to Auth0’s Universal Login page. After authenticating, you’ll be redirected back to your app and see your profile information.If port 3000 is already in use, update the
AUTH0_CALLBACK_URL in your .env file and the Allowed Callback URLs and Allowed Logout URLs in your Auth0 Application Settings to use the new port.CheckpointYou should now have a fully functional Go web application with Auth0 authentication running on your localhost. Your app:
- Redirects users to Auth0’s Universal Login for authentication
- Exchanges the authorization code for tokens using the
go-auth0SDK - Retrieves and displays user profile information
- Supports logout with session cleanup
Advanced Usage
Protecting routes with middleware
Protecting routes with middleware
Create an Apply the middleware to protected routes in
IsAuthenticated middleware to protect routes that require authentication. Add this to your handlers.go:handlers.go
main.go:main.go
Calling a protected API
Calling a protected API
After authentication, the access token stored in the session can be used to call a protected API:
To request an access token scoped to your API, add the
audience parameter to the authorization URL in auth.go:Refreshing tokens
Refreshing tokens
If your application uses refresh tokens, you can exchange a refresh token for a new set of tokens using the To receive a refresh token, add
go-auth0 SDK:offline_access to the scopes in your authorization URL:Troubleshooting
Common issues and solutions
Common issues and solutions
”Failed to exchange authorization code for token”
Problem: The callback handler cannot exchange the authorization code.Solutions:- Verify
AUTH0_CLIENT_SECRETis correct in your.envfile - Ensure the
AUTH0_CALLBACK_URLexactly matches the Allowed Callback URLs in your Auth0 Application Settings - Check that the authorization code hasn’t expired (codes are single-use and short-lived)
“Failed to get user info”
Problem: The/userinfo endpoint returns an error.Solutions:- Ensure the
openidscope is included in the authorization URL - Verify the access token is valid and not expired
- Check network connectivity to your Auth0 domain
”Invalid state parameter”
Problem: The state parameter in the callback doesn’t match the session.Solutions:- Ensure cookies are enabled in your browser
- Check that the session store secret hasn’t changed between requests
- Verify you’re not using multiple browser tabs during the login flow
Users can’t log out
Problem: After clicking logout, users see an Auth0 error page.Solutions:- Verify
http://localhost:3000is in the Allowed Logout URLs in your Auth0 Application Settings - Ensure the
client_idparameter matches your application’s Client ID - Check that the
returnToURL exactly matches one of the allowed logout URLs
Session data not persisting
Problem: User profile data disappears between requests.Solutions:- Ensure
gob.Register(map[string]interface{}{})is called before storing data - Check that
session.Save(r, w)is called after modifying session values - Verify cookies are not being blocked by browser settings
Next Steps
Now that you have authentication working, consider exploring:- User Profiles — Learn about the user information available after authentication
- Configure other identity providers — Add social or enterprise login options
- Enable multifactor authentication — Add an extra layer of security
- Access Token Best Practices — Learn about token security
- Production Checklist — Pre-launch security review
Resources
- go-auth0 GitHub — Source code and documentation
- Go Web App Sample — Complete working example
- Auth0 Community — Get help from the community